
 "
"
Woffice Custom Login Page – Setup Guide for WordPress






TL;DR
Woffice includes a built-in custom login page system — no extra plugins needed. Create a new WordPress page, assign the Login template, then go to Appearance → Theme Settings → Login/Register and toggle Custom Login Page on. From there, you can set a custom logo, background image and color, welcome message, after-login redirect URL, reCAPTCHA, and social login options. The whole setup takes under ten minutes and gives your intranet a fully branded login experience instead of the default WordPress screen.
How to Set Up a Custom Login Page in Woffice
If you are using the Woffice WordPress theme, you can easily set up a custom login page to improve branding and user experience. This guide explains how to configure the Woffice login page without requiring additional plugins or custom development. Everything covered here is built into Woffice’s theme settings.
Woffice login page: Feature overview
Woffice includes features that enable intranet administrators to customize the login page to better suit their organization. This makes it simpler for organizations that have a private intranet, extranet, or membership portal to integrate their brand.
Woffice intranet login page customization features are better and more integrated than those of other systems that use external plugins because Woffice has built customization features into its system and integrated its authentication and membership systems, as well as BuddyPress and user role systems.
What the Woffice login page system gives you:
- A fully branded login experience with your logo and colors
- Custom background image with adjustable opacity
- Welcome message and register message for new visitors
- After-login redirect URL to send users to the right dashboard
- reCAPTCHA (custom question or Google reCAPTCHA) for security
- Facebook and Google social login options
- Email verification support
- No extra plugins required
What is Woffice?
Woffice is a multi-purpose WordPress theme that lets you set up an intranet – as well as an extranet – channel seamlessly.
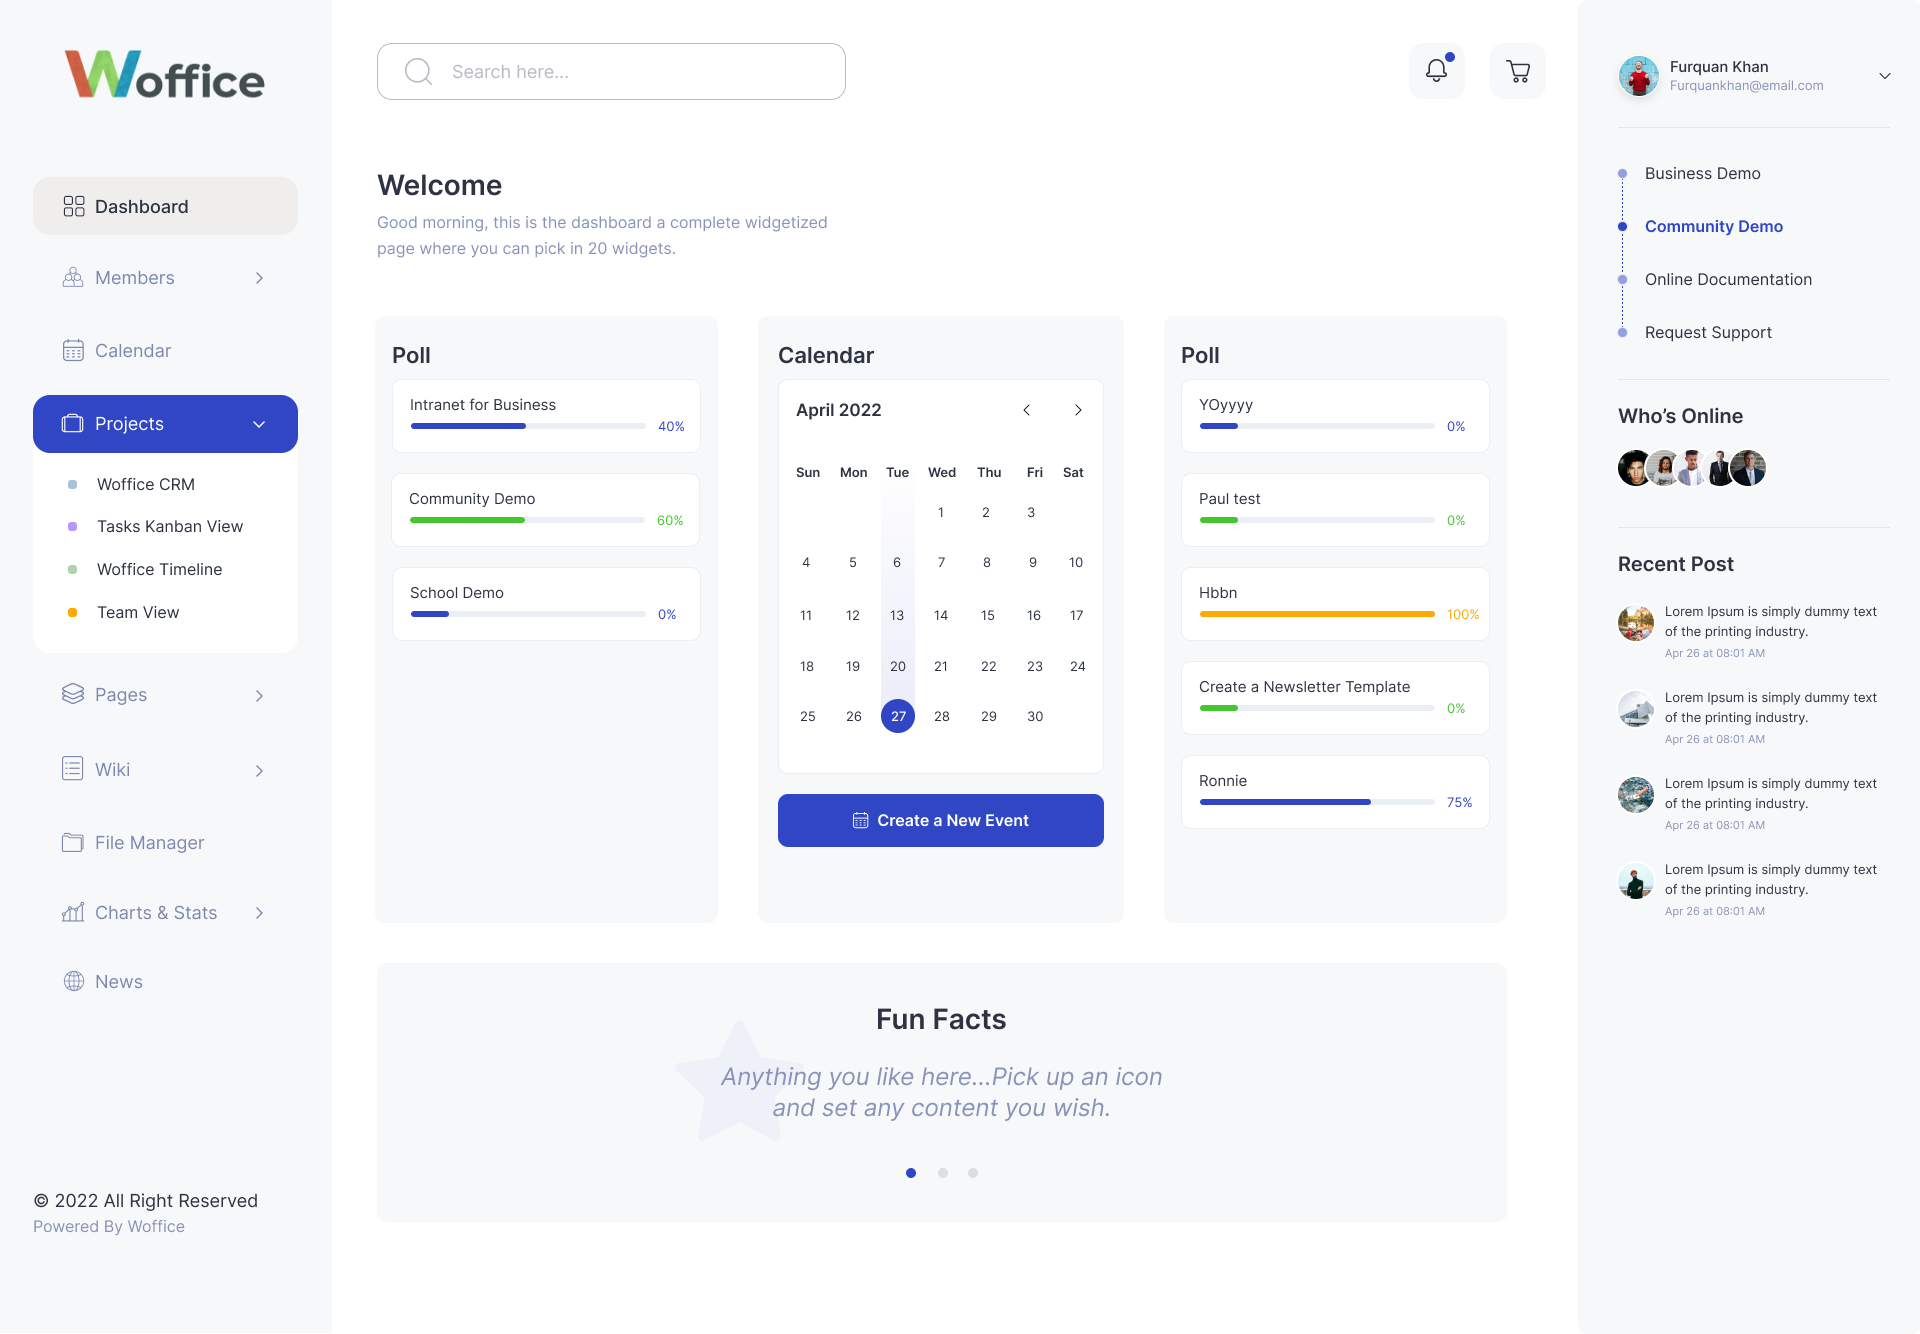
It comes packed with every imaginable feature you will need to smoothly manage internal communication and task within your organization.
Some of the popular features are:
- Calendar system that lets you plan out your future activities
- Widgetized dashboard, with a rich UI
- Powerful search to filter through your content and team members
- File and directory management
- Members map to accurately keep track of your team members
- Customizable login page
The magic? Woffice allows you to create a separate, customizable login page for your Intranet.
In this tutorial, I will show you how to create a customized login page without stress.
But first, why do you need a customized login page?
Why Is a Customizable Login Page Necessary?
Creating a custom login page for your intranet has a number of benefits.
Firstly, a well-designed login page inspires a sense of security to your users. It puts their mind at rest knowing that their login details are well secured.
In fact, using a separate login page makes it difficult for a user with a malicious motive to gain access.
Secondly, adding your organization’s logo and using custom images helps to improve the user experience. It makes your intranet more welcoming for users.
Lastly, a custom login page makes your organization come off as more professional, both in the eyes of internal employees and external entities that might have access to your portal (extranet).
With all that said, let me now show you how to create one on WordPress
Quick steps to set up a Woffice custom login page
For a fast reference before the full walkthrough:
- Install and activate the Woffice theme and all dependent plugins
- Create a new WordPress page and assign the Login page template
- Publish the page
- Navigate to Appearance → Theme Settings → Login/Register
- Toggle Custom Login Page to Yes
- Select your preferred login layout and configure branding options (logo, background, colors)
- Set your after-login redirect URL, welcome message, and security options
- Click Save Changes and test your login URL
How to Create and Customize a Login Page Using Woffice?
Before you proceed to create a custom login page, you need to have an Intranet WordPress theme like Woffice installed.
How to Install Woffice?
Step 1: Download and Upload Woffice to Your Website
Head over to Theme Forest to purchase the theme. Once you’ve done that, download the purchased theme and log in to your WordPress dashboard.
After doing that, navigate to Appearance >> Themes. Then click the Add New button like so:
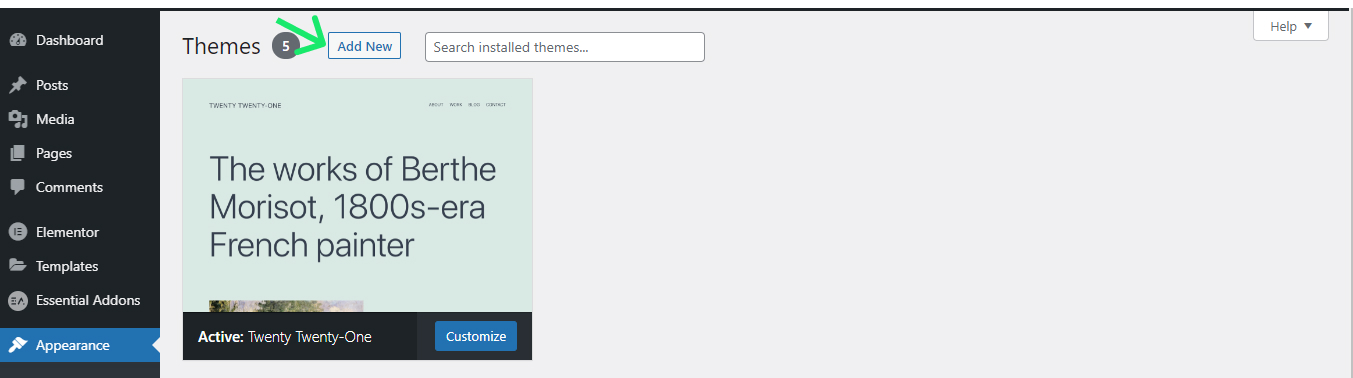
After that, click the Upload Theme button, locate the downloaded Woffice theme (in zipped format), and upload it to your website.
P.S: When you download Woffice from Themeforest, it often comes in two zipped forms: Woffice-Intranet.zip and woffice-4.0.2.zip. The latter is installable, the former is not. That is to say, upload woffice-4.0.2.zip and not the first one.
Once you’ve uploaded the Woffice theme, install and activate it. With that done, proceed to step 2.
Step 2: Install All Dependent Plugins
For Woffice to function properly, some plugins need to be installed.
But not to worry, you don’t have to manually install these plugins, one at a time. You can do so with few clicks of the button.
Start by clicking the Begin installing plugins link from your WordPress dashboard.
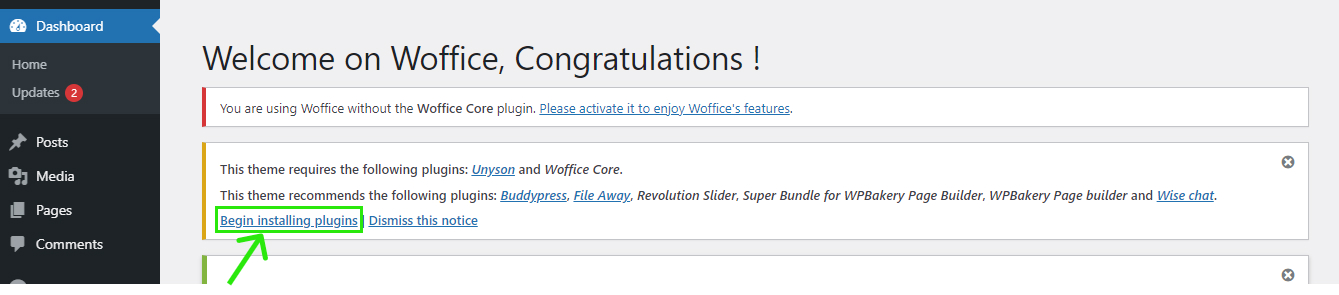
Upon click, you will be redirected to the plugin installation page. Here, click the Plugins checkbox, and then the Bulk actions dropdown box.
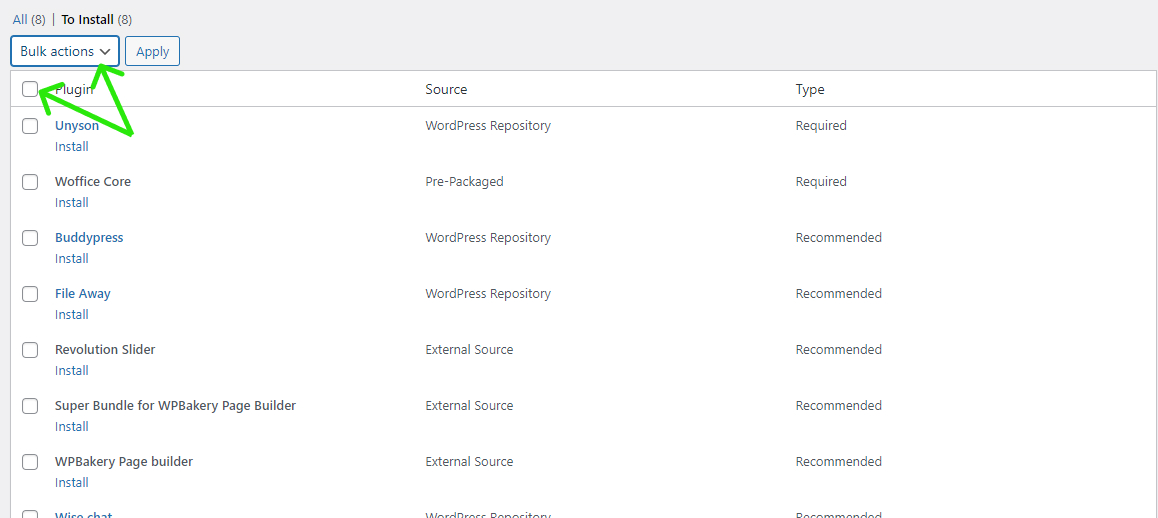
Then select Install, and then hit the Apply button.
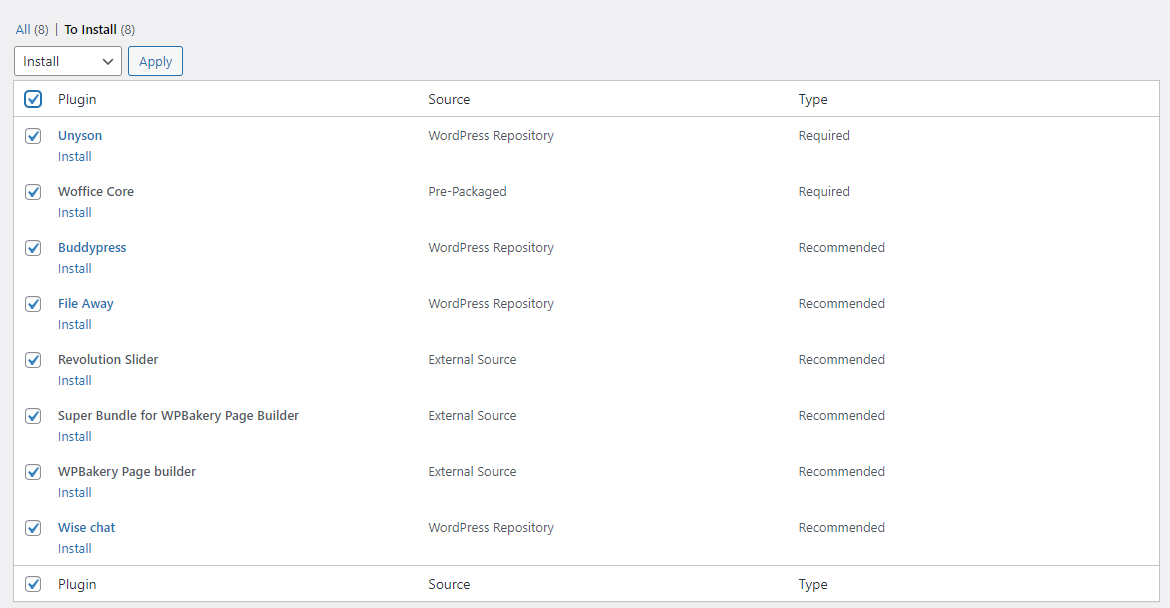
Upon click, all the selected plugins will automatically be installed. At this point, you are ready to start creating your custom login page.
How to Create a Custom Login Page
The setup happens in two stages: first you create the login page in WordPress, then you connect it inside Woffice’s theming options.
For the most up-to-date reference, see the Woffice Login Page documentation on the official docs site.
Login Page Customization Options
In addition to a custom layout and background image, Woffice also offers you lots of other customization options for your login page.
They are as follows:
- Image opacity. This allows you to adjust the opacity of the background image you use.
- Custom logo width
- After login URL: where would you like to direct users to once they log in?
- Register message: what message would you like to show unregistered users?
- Email verification
- reCAPTCHA: you can either use a reCAPTCHA question or Google reCAPTCHA
- Facebook and Google options
When you are done setting your customization options, click the Save Changes button.
What is a custom login page in Woffice?
A custom login page in Woffice allows WordPress sites to replace the default WordPress login screen (/wp-login.php) with a fully branded interface that reflects your organization’s identity. It is most commonly used in intranet systems, membership portals, and private business communities built with Woffice.
Unlike other separate login customization solutions, the design of the Woffice login page integrates directly with the theme’s user management and with BuddyPress and access control systems. Therefore, a custom login page designed using Woffice is more secure, more stable, and lower maintenance.
Because of the branded secure touchpoint that a custom Woffice login page provides, it is the ideal first page of access for users of a company intranet or extranet.
Related Woffice guides
- WordPress community theme: build social networks and intranets with Woffice — understanding how Woffice functions as both a community and intranet platform
- How to add a BuddyPress members map in WordPress — set up a geographic members map for your Woffice intranet
- Best collaboration tools for business — how Woffice fits into a wider collaboration stack
Conclusion
So there you have it; easy steps to create a custom login page using Woffice, one of the best Intranet WordPress themes in the market.
If you enjoyed this post, kindly share.